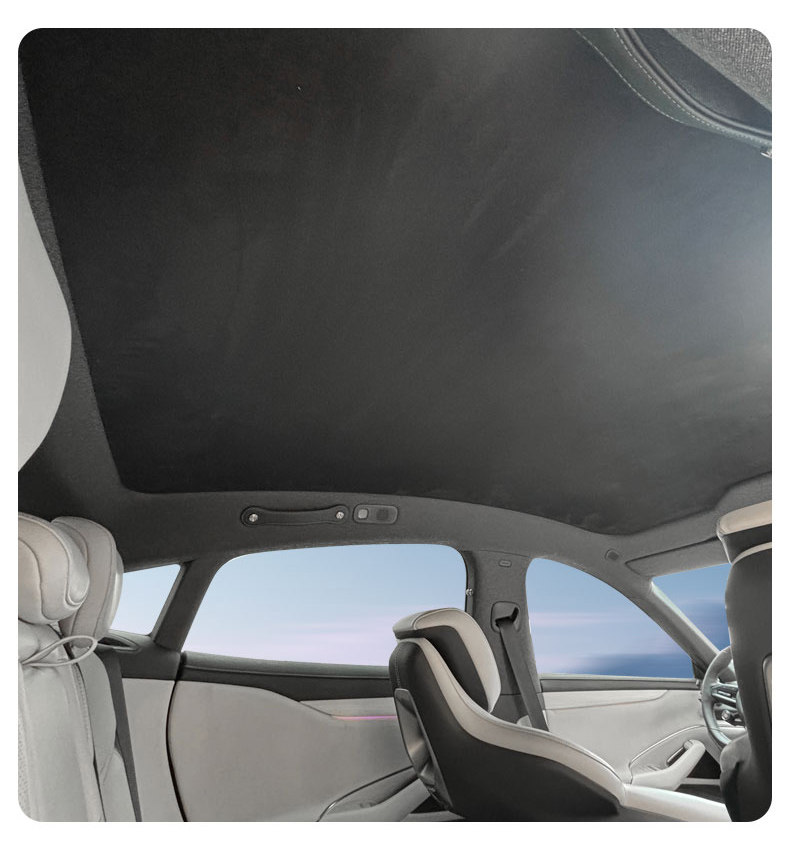
คู่มือการใช้งานHướng dẫn sử dụngUser guide

ขอบคุณที่เลือก
Mincar Sunroof
Cảm ơn bạn đã chọn
Mincar Sunroof
Thank you for choosing
Mincar Sunroof

ทุกอย่างที่ต้องรู้หลังได้รับสินค้า ทั้งวิดีโอติดตั้ง การถอดเก็บ การดูแล การแก้ปัญหา และการรับประกัน ติดตั้งถูกวิธีตั้งแต่ครั้งแรก แผ่นจะแนบเรียบและใช้งานได้นาน

Mọi thứ bạn cần sau khi nhận hàng: video lắp đặt, cách tháo cất, vệ sinh, xử lý sự cố và bảo hành. Lắp đúng ngay từ lần đầu, tấm sẽ bám phẳng và dùng được lâu.

Everything you need after unboxing: the install video, removing and storing, care, troubleshooting and warranty. Fit it right the first time and it sits flat and lasts.

  • ไม่ใช้กาว ถอดแล้วกระจกสะอาดKhông keo, tháo ra kính sạchNo glue, clean glass
  • ตัดตามรุ่นรถของคุณCắt đúng form theo dòng xeCustom-cut for your car model
  • รับประกัน 2 ปีBảo hành 2 năm2-year warranty
Mincar Sunroof
เริ่มที่นี่Bắt đầu từ đâyStart here

วิดีโอการติดตั้งVideo hướng dẫn lắp đặtInstallation video

ดูวิดีโอหนึ่งรอบก่อนลงมือ จะเห็นจังหวะการลอกแผ่นรองและการรีดชัดกว่าการอ่าน วิดีโอเล่นเองแบบปิดเสียง แตะที่วิดีโอเพื่อเปิดเสียง ขั้นตอนภาษาไทยอยู่ด้านล่าง

Xem video một lượt trước khi làm để thấy rõ cách bóc lót và miết. Video tự chạy không tiếng, chạm vào video để bật tiếng. Các bước bằng tiếng Việt ở ngay bên dưới.

Watch it once before you start: peeling the liner and squeegeeing are easier to see than to read. The video plays muted, tap it for sound. Written steps follow below.

ตรวจของก่อนKiểm tra trướcCheck first

ในกล่องมีอะไรTrong hộp có gìWhat is in the box

  • แผ่นบังแดด 1 หรือ 2 แผ่นตามรุ่นรถTấm che, 1 hoặc 2 tấm tùy xeSunshade, 1 or 2 panels
  • ไม้รีดสำหรับติดตั้งDụng cụ miết dánSqueegee
  • ถุงสำหรับม้วนเก็บTúi cuộn cấtStorage bag
  • คู่มือการใช้งานHướng dẫn sử dụngUser guide
  • บัตรรับประกันThẻ bảo hànhWarranty card

แผ่นรองติดมากับด้านซิลิโคนแล้ว เก็บไว้ใช้ปิดผิวตอนถอดเก็บ

Tấm lót có sẵn trên mặt silicone. Giữ lại để phủ lên khi tháo cất.

The liner comes on the silicone side. Keep it to cover the shade when you store it.

สำคัญที่สุดQuan trọng nhấtMost important

แผ่นมีสองด้านHai mặt của tấmKnow the two sides

กระจกKínhGlass
ด้านซิลิโคนสีเงินMặt silicone bạcSilver silicone sideแนบกับกระจกÁp vào kínhGoes on the glass
ด้านหนังกลับMặt da lộnSuede sideหันเข้าห้องโดยสารQuay vào trong xeFaces the cabin
ห้องโดยสารTrong xeCabin
ก่อนเริ่มTrước khi lắpBefore you start

อ่าน 30 วินาที ช่วยให้ติดครั้งเดียวผ่าน30 giây đọc trước để lắp một lần là xong30 seconds that save a second attempt

กระจกติดฟิล์มด้านใน?

ทดลองติดที่มุมหนึ่ง 24-72 ชั่วโมง แล้วลอกออกตรวจสอบก่อนติดทั้งแผ่น

Kính đã dán phim mặt trong?

Dán thử một góc 24-72 giờ, bóc ra kiểm tra rồi mới dán cả tấm.

Tinted film on the inside of the glass?

Stick one corner for 24-72 h, peel it off and check before fitting the whole panel.

แผ่นขนาดใหญ่

แผ่นขนาดใหญ่ควรติดตั้งสองคน จะจัดขอบได้เร็วและเรียบ

Tấm lớn một mảnh

Tấm lớn nên lắp hai người để căn mép nhanh và phẳng.

Large one-piece panels

Large one-piece panels are easier with 2 people.

กระจกร้าวหรือมีรอยลึก

ห้ามติดบนกระจกที่ร้าวหรือมีรอยขีดข่วนลึก

Kính nứt hoặc trầy sâu

Không lắp lên kính nứt hoặc trầy sâu.

Cracked or deeply scratched glass

Do not fit on cracked or deeply scratched glass.

มีกลิ่นหรือรอยพับเมื่อแกะใหม่

กลิ่น: วางในที่อากาศถ่ายเท 2-3 วันก่อนติดตั้ง รอยพับเกิดจากการม้วนขนส่ง จะเรียบเองภายในไม่กี่วันหลังติดตั้ง

Mới mở có mùi hoặc có nếp

Có mùi: để nơi thoáng 2-3 ngày trước khi dán. Nếp gấp do cuộn khi đóng gói, dán vài ngày tấm sẽ phẳng lại.

Smell or creases when new

Smell: air it in a ventilated place for 2-3 days before fitting. Creases come from rolling for shipping and flatten within a few days of fitting.

5 ขั้นตอน5 bước5 steps

การติดตั้งLắp đặtInstallation

ทำในที่ร่ม กระจกไม่ร้อน อ่านให้ครบ 5 ขั้นตอนก่อนลอกแผ่นรอง

Chọn chỗ râm, kính không nóng. Đọc hết 5 bước trước khi bóc lót.

Work in the shade with the glass cool. Read all 5 steps before peeling the liner.

  1. 1

    ทำความสะอาดกระจก

    เช็ดด้านในกระจกหลังคาด้วยผ้าชุบน้ำหมาด แล้วเช็ดให้แห้งสนิท ห้ามใช้น้ำยาที่มีน้ำมัน แว็กซ์ หรือน้ำยาเคลือบเงา

    Làm sạch kính

    Lau mặt trong kính trần bằng khăn ẩm, sau đó lau khô hoàn toàn. Không dùng dung dịch có dầu, sáp hoặc chất dưỡng bóng.

    Clean the glass

    Wipe the inside of the roof glass with a damp cloth, then dry it completely. Do not use polish, wax or oily cleaners.

  2. 2

    ทาบลองก่อน

    ขอบหน้าและขอบหลังมีขนาดไม่เท่ากัน ทาบแผ่นกับกระจกโดยยังไม่ลอกแผ่นรอง ตรวจทิศหน้า หลัง ซ้าย ขวาให้ถูกต้อง

    Ướm thử trước

    Mép trước và mép sau có kích thước khác nhau. Khi chưa bóc lót, đặt tấm lên kính, xác định đúng trước, sau, trái, phải.

    Test-fit first

    Front and rear edges differ in size. Keep the liner on, hold the shade to the glass and check front, rear, left and right.

  3. 3

    ด้านสีเงินติดกระจก

    ด้านซิลิโคนสีเงินแนบกับกระจก ด้านหนังกลับหันเข้าห้องโดยสาร หลีกเลี่ยงการใช้มือสัมผัสด้านซิลิโคน

    Mặt bạc áp vào kính

    Mặt silicone màu bạc áp vào kính, mặt da lộn quay vào trong xe. Hạn chế chạm tay vào mặt silicone.

    Silver side to the glass

    The silver silicone side goes on the glass, the suede side faces the cabin. Avoid touching the silicone side with your fingers.

  4. 4

    ลอกและรีด

    ลอกแผ่นรองออกบางส่วน จัดขอบด้านหน้าให้ตรงก่อน แล้วใช้ไม้รีดรีดจากตรงกลางออกไปที่ขอบ ทำทีละส่วนจนเสร็จ

    Bóc lót và miết

    Bóc một phần lớp lót, căn mép trước. Dùng dụng cụ miết vuốt từ giữa ra mép để đẩy khí, làm tiếp từng phần đến hết tấm.

    Peel and press

    Peel back part of the liner and align the front edge first. Use the squeegee to smooth from the centre outwards. Continue section by section.

  5. 5

    ตรวจสอบ

    ไม่บังกล้อง เซ็นเซอร์ หรือไฟเพดาน ม่านเดิมและซันรูฟเปิดปิดได้ปกติ ตรวจขอบอีกครั้งหลัง 24 ชั่วโมง

    Kiểm tra

    Không che camera, cảm biến, đèn trần. Rèm nguyên bản và cửa sổ trời đóng mở bình thường. Kiểm tra lại mép sau 24 giờ.

    Final check

    No camera, sensor or roof light covered. The original blind and sunroof move freely. Check the edges again after 24 hours.

เมื่ออยากชมวิวKhi muốn ngắm trờiWhen you want the view

ถอดและเก็บTháo và cất giữRemove and store

  1. 1

    ค่อยๆ ดึงจากมุมหนึ่ง ห้ามกระชากขอบ

    Kéo chậm từ một góc, không giật mép.

    Pull slowly from one corner. Do not yank the edge.

  2. 2

    ปิดด้านซิลิโคนด้วยแผ่นรอง หากไม่มีใช้ฟิล์มถนอมอาหาร

    Phủ tấm lót lên mặt silicone, mất lót thì dùng màng bọc thực phẩm.

    Cover the silicone side with the liner, or with cling film if the liner is lost.

  3. 3

    ม้วนให้ด้านซิลิโคนอยู่ด้านนอก ใส่ถุง เก็บในที่แห้งและเย็น

    Cuộn với mặt silicone quay ra ngoài, cho vào túi, cất nơi khô mát.

    Roll with the silicone side out, put it in the bag, store in a cool dry place.

ม้วนให้ด้านซิลิโคนอยู่ด้านนอก ไม่ใช่ด้านใน แผ่นจะคืนตัวเรียบเมื่อติดกลับCuộn mặt silicone ra ngoài, không cuộn vào trong. Khi dán lại tấm sẽ phẳng nhanh hơn.Roll with the silicone side out, not in. It lies flat again faster when you refit it.
ใช้งานได้นานDùng bềnMake it last

การดูแลรักษาVệ sinhCare

ด้านหนังกลับ

ใช้ลูกกลิ้งเก็บฝุ่น แปรงขนนุ่ม หรือผ้าชุบน้ำหมาด

Mặt da lộn

Con lăn bụi, bàn chải mềm hoặc khăn hơi ẩm.

Suede side

Lint roller, soft brush or a slightly damp cloth.

แรงยึดเกาะลดลง

ล้างด้านซิลิโคนด้วยน้ำสะอาด ผึ่งให้แห้งเองแล้วติดใหม่

Mặt bám giảm độ dính

Rửa bằng nước sạch, để khô tự nhiên rồi dán lại.

Grip getting weaker?

Rinse the silicone side with clean water, let it air-dry fully, then refit.

สิ่งที่ห้ามทำ

ห้ามใช้สบู่ แอลกอฮอล์ หรือตัวทำละลาย ห้ามพับจนเป็นรอย และไม่ควรทิ้งไว้ในรถที่ร้อน

Không nên

Không dùng xà phòng, cồn, dung môi. Không gấp nếp, không để tấm đã cất trong xe nóng.

Avoid

No soap, alcohol or solvents. Do not fold sharply or leave the stored shade in a hot car.

แก้ปัญหาXử lý sự cốTroubleshooting

ถ้ามีอะไรไม่เป็นไปตามที่คิดNếu có gì chưa như ýIf something is not right

ติดไม่อยู่Không bámDoes not stick

เช็ดกระจกสองรอบ ล้างด้านซิลิโคน ผึ่งให้แห้งแล้วติดใหม่

Lau kính hai lần, rửa mặt bám, để khô rồi dán lại.

Clean the glass twice, rinse the silicone side, let it dry, refit.

ฟองอากาศBọt khíAir bubbles

ใช้ไม้รีดดันฟองอากาศออกไปที่ขอบ

Dùng dụng cụ miết đẩy bọt khí ra mép.

Push them out to the edge with the squeegee.

รอยพับเมื่อแกะใหม่Nếp gấp khi mới mởCreases when new

เกิดจากการม้วนขนส่ง เป็นเรื่องปกติ จะเรียบเองภายในไม่กี่วันหลังติดตั้ง

Do cuộn khi đóng gói, là bình thường. Dán vài ngày tấm sẽ phẳng lại.

Normal after rolling for shipping. They flatten within a few days of fitting.

ขอบใหญ่เกินเล็กน้อยMép hơi rộngEdge too big

ใช้ไม้รีดดันขอบส่วนเกินเข้าไปในร่องขอบหลังคา

Dùng dụng cụ miết nhét phần thừa vào khe ốp trần.

Tuck the extra edge into the roof trim gap with the squeegee.

มีแสงลอดบางจุดHở sáng một chỗLight leaks

ค่อยๆ ลอกรอบจุดนั้นแล้วรีดให้แนบใหม่

Bóc nhẹ quanh chỗ hở rồi miết lại cho sát.

Gently lift around the spot and squeegee it down again.

มีกลิ่นเมื่อแกะใหม่Có mùi khi mới mởSmell when new

วางในที่อากาศถ่ายเท 2-3 วันก่อนติดตั้ง

Để nơi thoáng 2-3 ngày trước khi dán.

Air it in a ventilated place for 2-3 days before fitting.

ขับบนถนนขรุขระจะหลุดไหมĐi đường xóc có rơi không?Will it fall on bumpy roads?

กระจกสะอาด แห้ง และติดตั้งตามคู่มือ จะยึดแน่นในการขับขี่ปกติ หากมีมุมที่ไม่ติดหลังทำความสะอาดและติดใหม่แล้ว ทักแชทเพจ ร้านจะตรวจสอบและเปลี่ยนให้

Kính sạch, khô, lắp đúng hướng dẫn thì bám chắc khi chạy bình thường. Góc nào không bám sau khi vệ sinh và dán lại, nhắn fanpage để shop kiểm tra và đổi.

On clean, dry glass, fitted as shown, it holds firm in normal driving. If a corner still will not stick after cleaning and refitting, message us and we will check and replace it.

2ปีnămyears
รับประกันBảo hànhWarranty

รับประกัน 2 ปีBảo hành 2 năm2-year warranty

รายละเอียดอยู่บนบัตรรับประกันที่แนบมาในกล่อง

Chi tiết trên thẻ bảo hành kèm trong hộp.

See the warranty card in the box for details.

  • เก็บกล่อง ถุง และอุปกรณ์ไว้เผื่อต้องเปลี่ยนสินค้าGiữ lại hộp, túi và phụ kiện để dùng khi cần đổi hàng.Keep the box, bag and accessories in case you need an exchange.
  • หยุดใช้หากมีกลิ่นผิดปกติต่อเนื่อง ชั้นยึดเกาะพองหรือแตก แล้วทักแชทเพจNgừng dùng khi có mùi lạ kéo dài, phồng rộp hoặc nứt lớp bám, rồi nhắn fanpage.Stop using it if you notice a lasting odd smell, blistering or cracks in the grip layer, then message us.
  • เก็บถุงและแผ่นรองให้พ้นมือเด็กเล็กĐể túi và tấm lót xa tầm tay trẻ nhỏ.Keep the bag and liner away from small children.

ตรวจสอบการรับประกันKiểm tra bảo hànhCheck your warranty

กรอกรหัสบนบัตรรับประกัน

Nhập mã in trên thẻ bảo hành.

Enter the code printed on your warranty card.

CHECK AUTHENTICITY

Searching...
ต้องการความช่วยเหลือCần hỗ trợNeed help

เราอยู่ตรงนี้Shop luôn sẵn sàngWe are here

ปกป้องครบทุกด้านBảo vệ trọn bộComplete sun protection

หลังคาเรียบร้อยแล้ว แล้วกระจกข้างกับคอนโซลล่ะ?Trần xe đã được che. Còn kính bên và taplo?The roof is covered. What about the windows and dashboard?

แดดเข้ารถได้หลายทาง ทั้งหลังคากระจก กระจกข้าง และกระจกหน้าที่ส่องลงบนคอนโซล Mincar Sunroof ดูแลส่วนเหนือศีรษะแล้ว ถ้ารถของคุณจอดกลางแจ้งบ่อย สองชิ้นนี้ช่วยปิดส่วนที่เหลือ และตัดตามรุ่นรถเหมือนแผ่นที่คุณเพิ่งติด

Nắng vào xe từ nhiều phía: kính trần, kính bên, và kính lái chiếu thẳng xuống taplo. Mincar Sunroof đã lo phần trên đầu. Nếu xe bạn hay đỗ ngoài trời, hai sản phẩm dưới đây che nốt phần còn lại, cùng cắt theo đúng dòng xe như tấm bạn vừa lắp.

Sun gets in from several sides: the glass roof, the side windows, and the windscreen onto the dashboard. Mincar Sunroof has the roof covered. If your car is often parked outside, these two cover the rest, cut for your model just like the shade you just fitted.

FRONT
  • Mincar Sunroof · ติดตั้งแล้วMincar Sunroof · đã lắpMincar Sunroof · fitted
  • ม่านแม่เหล็ก Mincar MagneticRèm nam châm Mincar MagneticMincar Magnetic sunshades
  • พรมคอนโซลหน้าThảm taploDashboard cover
กระจกข้างและประตูหลังKính cửa bên và cửa hậuSide windows and tailgate

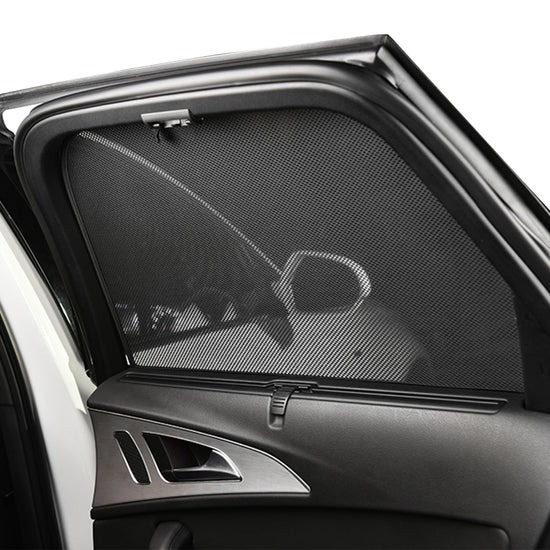
ม่านบังแดดแม่เหล็ก Mincar MagneticRèm che nắng nam châm Mincar MagneticMincar Magnetic sunshades

  • ติดด้วยแม่เหล็กที่ขอบประตู ไม่ต้องเจาะ ไม่ใช้กาวGắn bằng nam châm vào khung cửa, không khoan, không keoMagnets hold it to the door frame, no drilling, no glue
  • ตัดตามรุ่นรถ ติดและถอดได้ในไม่กี่วินาทีCắt theo đúng dòng xe, lắp và tháo trong vài giâyCut for your car model, on and off in seconds
  • ลดแดดที่ส่องโดนเบาะและผู้โดยสาร เพิ่มความเป็นส่วนตัวBớt nắng chiếu vào ghế và người ngồi, kín đáo hơnLess sun on the seats and passengers, more privacy
  • เลือกได้ 2 ประตู 4 ประตู ประตูหลัง หรือทั้งคันChọn 2 cửa, 4 cửa, cửa hậu hoặc cả xeChoose 2 doors, 4 doors, tailgate or the full set
ดูรายละเอียดและเลือกรุ่นรถXem chi tiết và chọn xeSee details and choose your car
คอนโซลหน้าTaploDashboard

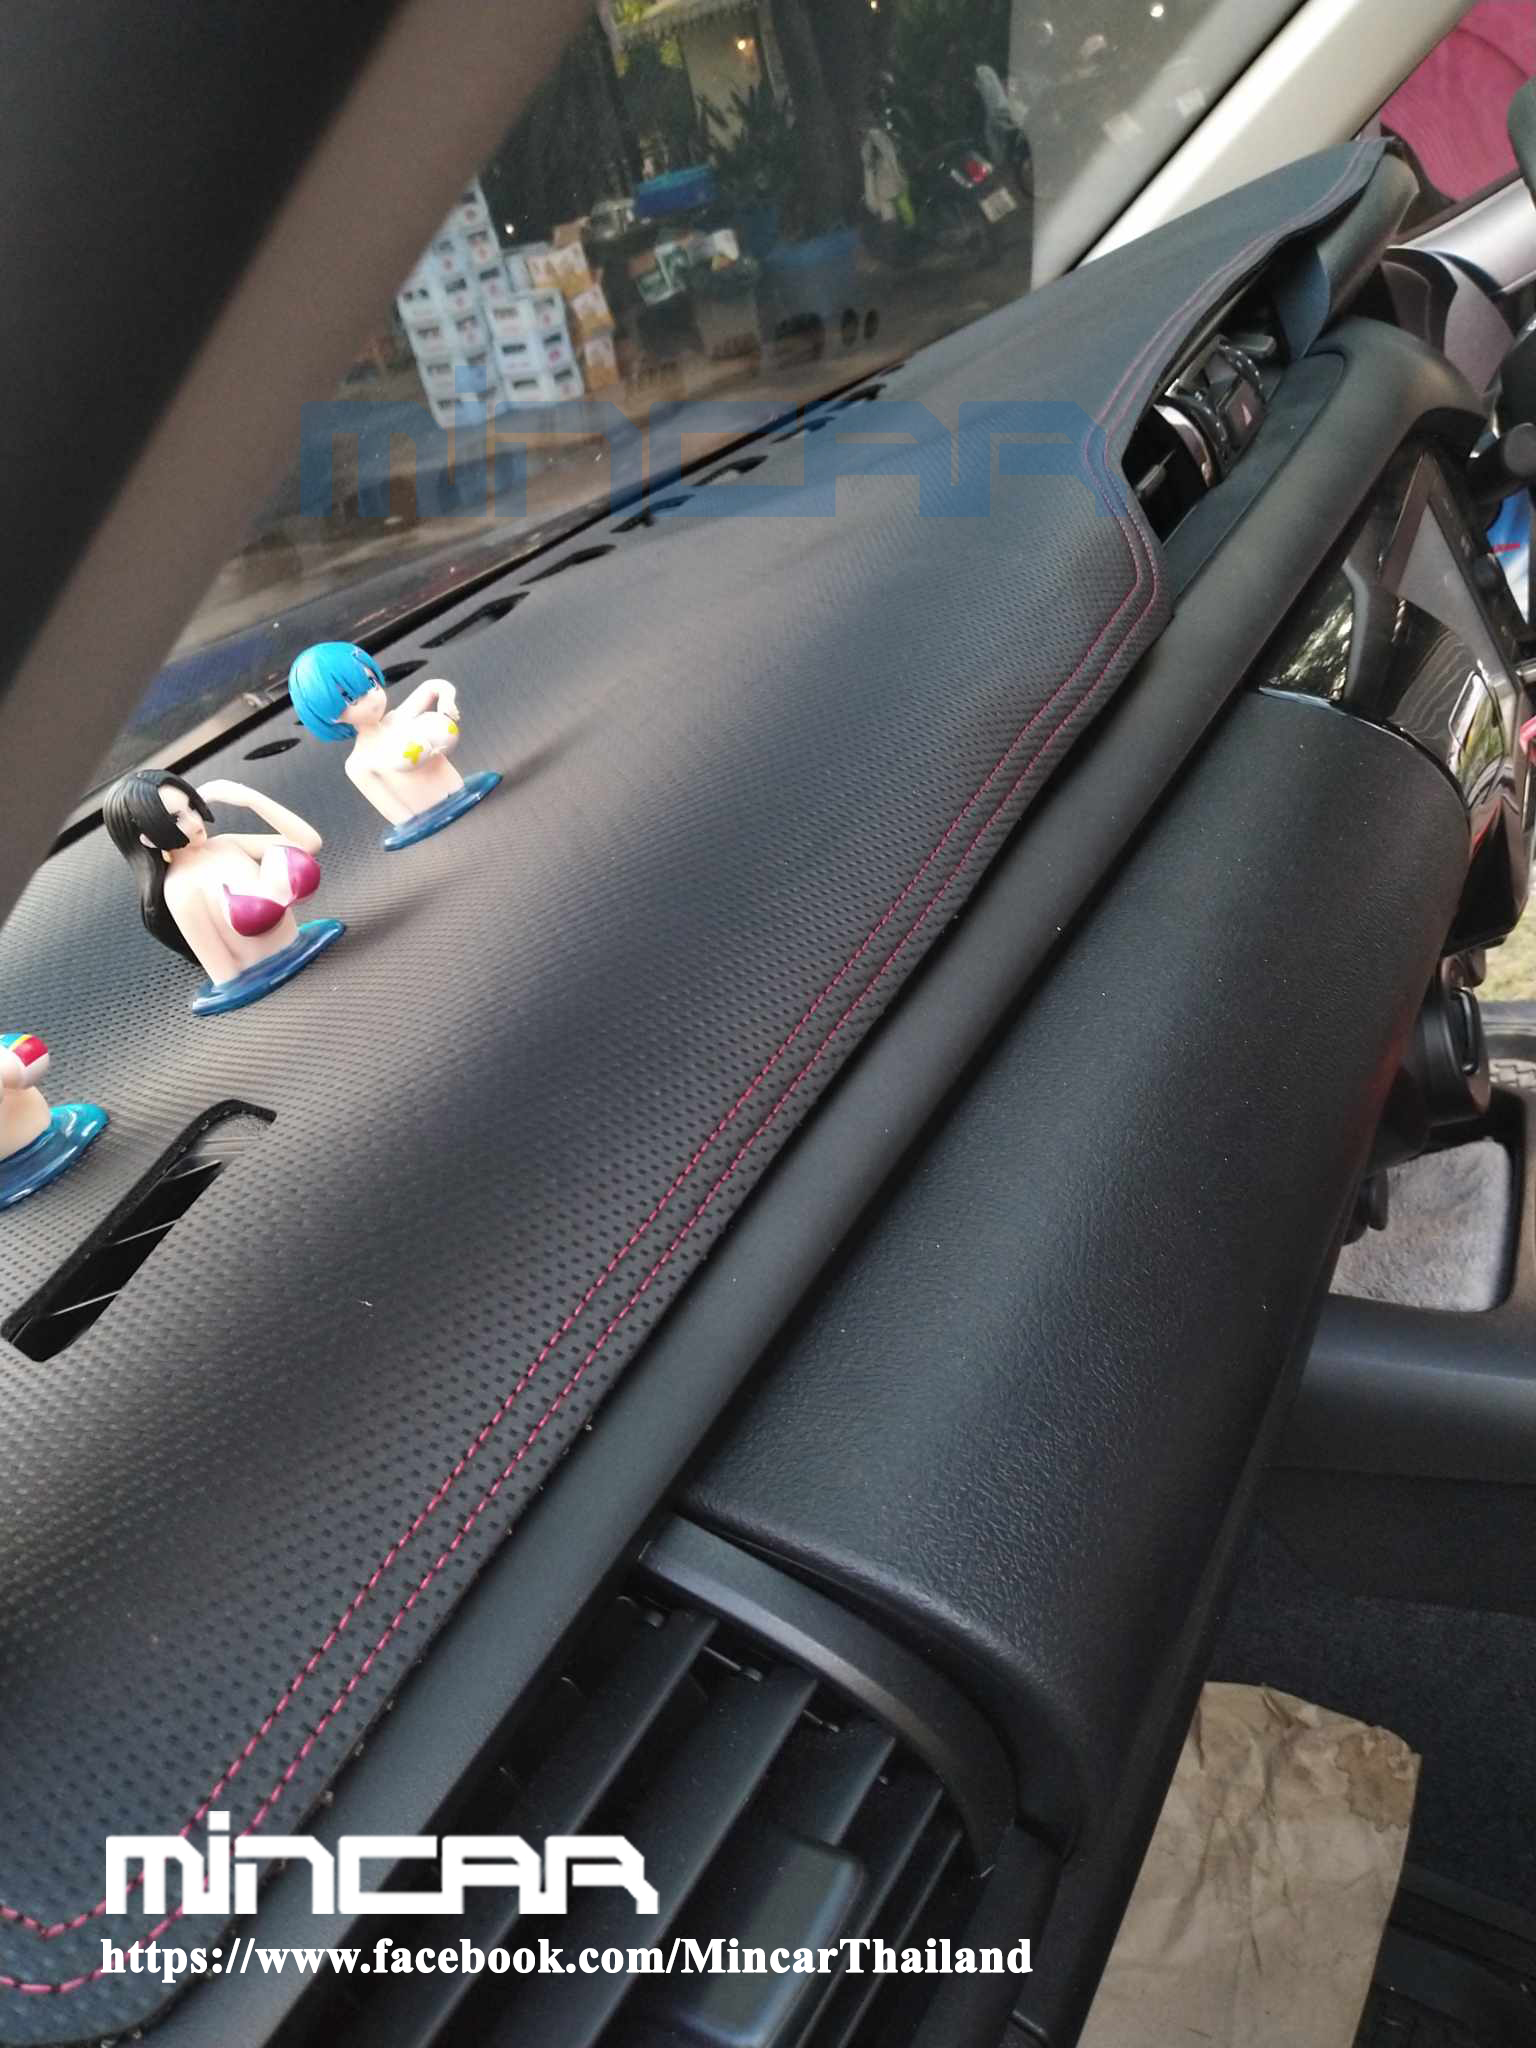
พรมคอนโซลหน้าหนังลายคาร์บอนThảm taplo da vân carbonCarbon-pattern leather dashboard cover

  • ตัดตามรูปทรงคอนโซลหน้าของแต่ละรุ่นCắt theo form taplo của từng dòng xeShaped to the dashboard of your model
  • ลดแสงสะท้อนจากคอนโซลขึ้นกระจกหน้าGiảm nắng chói phản chiếu từ taplo lên kính láiCuts the dashboard glare reflected onto the windscreen
  • ปกป้องคอนโซลจากแดดตรง ลดการซีดจางChe taplo khỏi nắng trực tiếp, hạn chế bạc màuShields the dashboard from direct sun and fading
  • หนังลายคาร์บอน เลือกด้ายแดงหรือด้ายดำDa vân carbon, chọn chỉ đỏ hoặc chỉ đenCarbon-pattern leather, red or black stitching
ดูรายละเอียดและเลือกรุ่นรถXem chi tiết và chọn xeSee details and choose your car

เลือกยี่ห้อ รุ่น และปีรถบนหน้าสินค้า เหมือนตอนสั่ง Mincar Sunroof

Chọn hãng xe, dòng xe, năm xe trên trang sản phẩm, giống như khi bạn đặt Mincar Sunroof.

Pick your make, model and year on the product page, just like when you ordered Mincar Sunroof.

MINCAR SUNROOF

ผลิตในประเทศเวียดนาม · รับประกัน 2 ปี

Sản xuất tại Việt Nam · Bảo hành 2 năm

Made in Viet Nam · 2-year warranty

สแกน QR บนคู่มือเพื่อกลับมาที่หน้านี้ได้ทุกเมื่อ

Quét mã QR trên tờ hướng dẫn để mở lại trang này bất cứ lúc nào.

Scan the QR code on the guide to come back to this page any time.